# less 简介
less是一门css的预处理语言
less是一个 css 的增强版,通过less可以编写更少的代码实现更强大的样式- 在
less中添加了许多的新特性:像对变量的支持、对mixin的支持... less的语法大体上和css语法一致,但是less中增添了许多对css的扩展,所以浏览器无法直接执行less代码,要执行必须向将less转换为css,然后再由浏览器执行
# 1、安装插件
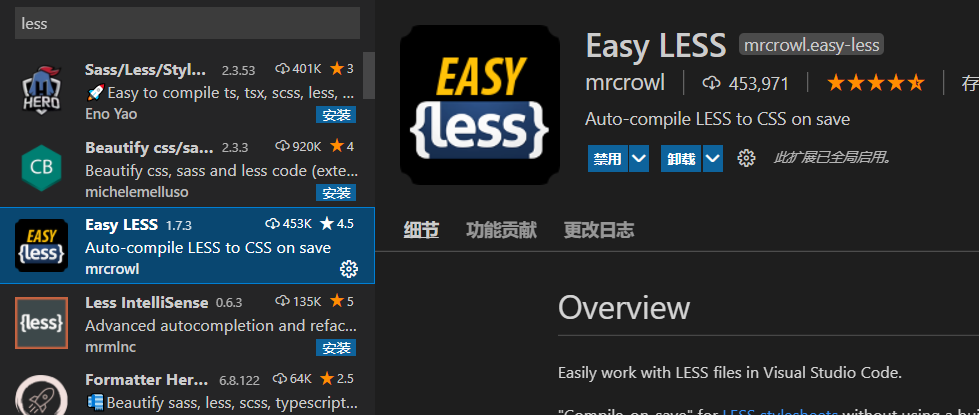
在vscode中搜索less,点击安装
# 2、编写 less
html 代码
使用快捷方式创建html代码

回车生成html代码
<div class="box1"></div>
<div class="box2"></div>
<div class="box3"></div>
2
3
less 代码
创建style.less文件,编写less代码
body {
  --height: calc(200px / 2);
  --width: 100px;
  div {
    height: var(--height);
    width: var(--width);
  }
  .box1 {
    background-color: #bfa;
  }
  .box2 {
    background-color: red;
  }
  .box3 {
    background-color: yellow;
  }
}
2
3
4
5
6
7
8
9
10
11
12
13
14
15
16
17
Easy LESS插件会帮助我们在style.less所在目录下面生成一个相同名称的css文件

查看生成的style.css代码
body {
  --height: calc(200px / 2);
  --width: 100px;
}
body div {
  height: var(--height);
  width: var(--width);
}
body .box1 {
  background-color: #bfa;
}
body .box2 {
  background-color: red;
}
body .box3 {
  background-color: yellow;
}
2
3
4
5
6
7
8
9
10
11
12
13
14
15
16
17
我们直接在 HTML 中引入生成的style.css
<link rel="stylesheet" href="/css/style.css" />
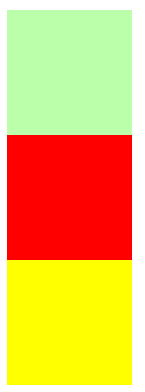
运行代码,查看效果
# 3、less 语法
# less 注释
less中的单行注释,注释中的内容不会被解析到css中
css中的注释,内容会被解析到css文件中
// `less`中的单行注释,注释中的内容不会被解析到`css`中

/*
`css`中的注释,内容会被解析到`css`文件中
*/
2
3
4
5
# 父子关系嵌套
在less中,父子关系可以直接嵌套
// `less`中的单行注释,注释中的内容不会被解析到`css`中

/*
`css`中的注释,内容会被解析到`css`文件中
*/
body {
  --height: calc(200px / 2);
  --width: 100px;
  div {
    height: var(--height);
    width: var(--width);
  }
  .box1 {
    background-color: #bfa;
    .box2 {
      background-color: red;
      .box3 {
        background-color: yellow;
      }
      > .box4 {
        background-color: green;
      }
    }
  }
}
2
3
4
5
6
7
8
9
10
11
12
13
14
15
16
17
18
19
20
21
22
23
24
25
对应的css
/*
`css`中的注释,内容会被解析到`css`文件中
*/
body {
  --height: calc(200px / 2);
  --width: 100px;
}
body div {
  height: var(--height);
  width: var(--width);
}
body .box1 {
  background-color: #bfa;
}
body .box1 .box2 {
  background-color: red;
}
body .box1 .box2 .box3 {
  background-color: yellow;
}
body .box1 .box2 > .box4 {
  background-color: green;
}
2
3
4
5
6
7
8
9
10
11
12
13
14
15
16
17
18
19
20
21
22
23
# 变量
变量,在变量中可以存储一个任意的值
并且我们可以在需要时,任意的修改变量中的值
变量的语法:@变量名
- 直接使用使用变量时,则以
@变量名的形式使用即可 - 作为类名、属性名或者一部分值使用时,必须以
@{变量名}的形式使用 - 可以在变量声明前就使用变量(可以但不建议)
@b1:box1;
@b2:box2;
@b3:box3;
@size:200px;
@bc:background-color;
@bi:background-image;
@color:red;
@path:image/a/b/c;

.@{b1}{
  width: @size;
  height: $width;
  @{bc}: @color;
  @{bi}: url("@{path}/1.png");
}

.@{b2}{
  width: @size;
  height: $width;
  @{bc}: @color;
  @{bi}: url("@{path}/2.png");
}

.@{b3}{
  width: @size;
  height: $width;
  @{bc}: @color;
  @{bi}: url("@{path}/3.png");
}
2
3
4
5
6
7
8
9
10
11
12
13
14
15
16
17
18
19
20
21
22
23
24
25
26
27
28
29
生成的css代码
.box1 {
  width: 200px;
  height: 200px;
  background-color: red;
  background-image: url("image / a / b / c/1.png");
}
.box2 {
  width: 200px;
  height: 200px;
  background-color: red;
  background-image: url("image / a / b / c/2.png");
}
.box3 {
  width: 200px;
  height: 200px;
  background-color: red;
  background-image: url("image / a / b / c/3.png");
}
2
3
4
5
6
7
8
9
10
11
12
13
14
15
16
17
18
注意:在url中使用less语法需要用引号包裹
# 其他
.p1 {
  width: @size;
  height: $width;
  &-wrapper {
    background-color: peru;
  }
  // &:hover{
  //   background-color: blue;
  // }
  :hover {
    background-color: blue;
  }
}
.p2:extend(.p1) {
  color: @color;
}
.p3 {
  .p1();
}
.p4() {
  width: @size;
  height: $width;
}
.p5 {
  // .p4();
  .p4;
}
2
3
4
5
6
7
8
9
10
11
12
13
14
15
16
17
18
19
20
21
22
23
24
25
26
27
生成的css代码
.p1,
.p2 {
  width: 200px;
  height: 200px;
}
.p1-wrapper {
  background-color: peru;
}
.p1 :hover {
  background-color: blue;
}
.p2 {
  color: red;
}
.p3 {
  width: 200px;
  height: 200px;
}
.p5 {
  width: 200px;
  height: 200px;
}
2
3
4
5
6
7
8
9
10
11
12
13
14
15
16
17
18
19
20
21
22
&拼接- 伪元素
:extend()对当前选择器扩展指定选择器的样式(选择器分组).p1()直接对指定的样式进行引用,这里就相当于将p1的样式在这里进行了复制(mixin混合)- 使用类选择器时可以在选择器后边添加一个括号,这时我们实际上就创建了一个
mixins混合函数
# 4、混合函数
在混合函数中可以直接设置变量,并且可以指定默认值
.test(@w:200px, @h:100px, @bc:red) {
  width: @w;
  height: @h;
  background-color: @bc;
}

.p6 {
  // .test(200px, 100px, red); // 对应参数位传值
  // .test(@h:200px,@w:100px,@bc:red); // 写明对应属性,可变换顺序
  // .test();
  .test(300px);
}
2
3
4
5
6
7
8
9
10
11
12
生成的css代码
.p6 {
  width: 300px;
  height: 100px;
  background-color: red;
}
2
3
4
5
# 其他
average混合函数.h1 { color: average(red, yellow); }1
2
3生成的
css代码.h1 { color: #ff8000; }1
2
3darken混合函数body { background-color: darken(#bfa, 50%); }1
2
3生成的
css代码body { background-color: #22aa00; }1
2
3
# 5、补充
创建all.less文件,将我们之前编写的less文件通过@import引入进来
可以通过import来将其他的less引入到当前的less中
@import "style.less";
@import "syntax.less";
2
查看生成的all.css代码,会发现其他的内容囊括了两个less文件的内容
所以,我们可以利用@import来对less文件进行整合,然后引入生成的css文件使用即可
这样,每次修改的时候直接对某个模块的less文件进行修改,就会非常简单
如果我们观察过之前fontawesome源码文件,会发现其中也有less代码文件

不同的less文件里都有其自己的职责,如
_animated.less中专门存放动画的混合函数_variables.less中专门存放定义的变量- ...
但是也有个问题,通过F12调试时显示的也是css中对应的行号
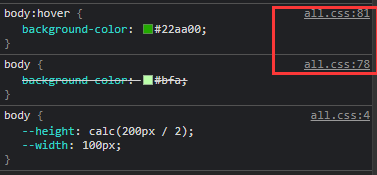
如果我们要改,需要找一下,太麻烦了,能不能直接显示less中行号呢?这样我们直接定位到对应less中直接进行修改,维护起来也会比较方便
我们需要在Easy LESS插件中修改settings.json文件,在其中添加如下配置
"less.compile": {
    "compress": true, // true => remove surplus whitespace
    "sourceMap": true, // true => generate source maps (.css.map files)
    "out": true // false => DON'T output .css files (overridable per-file, see below)
}
2
3
4
5
修改完毕后,会发现多生成出来一个all.css.map文件,说明配置生效
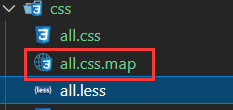
再刷新下页面,通过F12会发现变成了less文件对应的行号
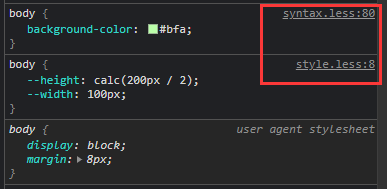
我们来逐一解释下配置的less.compile项中每一个属性的含义
compress生成的css文件代码会被压缩(作用相当于我们之前安装的JS & CSS Minifier (Minify)插件的效果)sourceMap生成.css.map文件,通过F12可以查看了less文件对应行号out生成对应css文件(当然是需要了)
